
 Back
BackRegion editor
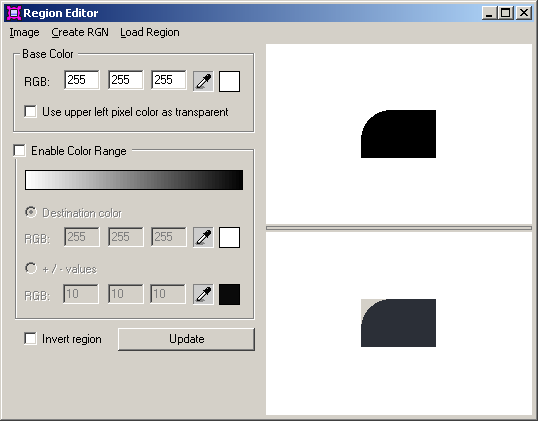
Region editor is one of SkinBuilder internal tools that can be activated via menu Tools>>Region Editor
(Ctrl+E) or by pressing on Region editor  button on ToolBar.
Region is a stencil for transparent and opaque parts of image basically applying for Frame sides skinning.
Region is also can be called a mask. It contains only two colors: black and white. The black region corresponds to the non-transparent
part of the color image and the white region to the transparent part.
Region Editor is a utility for region (.rgn) files creation intended mainly for Window Frame adjustment.
The way of region producing is the range setting of transparent colors in the loaded bitmap. The resulting region is created
by combining of all opaque areas.
Region creating process
 Open the .bmp image which is appeared in the upper window for editing. Take advantage of the Color Picker tool
  to define transparent color.
Press "Update" button to view the changes applied.
Click "Create RGN" menu button to save the region with the name you would like.

The Color Picker lets you choose transparent color from broad color spectrum presented directly on an image.
When you click Color Picker on a picture in the upper window a new transparent color is applied. Automatically current
RGB values are assigned in selection box.
Menu buttons - Image, Create RGN, Load RGN - provide access to standard file-based functionality:
Pressing "Image" button entails showing of "Open" dialog to choose a .bmp file for the following region creation.
"Create RGN" button creates a new region (.rgn file) based on .bmp file chosen.
Update - press this button if you want to see the region with your latest changes applied.
Color Picker is the graphic color selector which can be used for color choosing from an image.
Alternatively, you can manually input the color in RGB format.
Transparent color
There are two ways of defining transparent colors:
1. Set up a base color and destination color, in this case all the colors between them will be considered as transparent.
2. Set up a base color and +\- values (changing these will widen or narrow the transparent color range).
- Marking "Use upper left pixel color as transparent" checkbox you set base transparent color to the color of upper left pixel of an image.
- Base color is a base transparent color. It may be set up whether by inputting RGB values or by picking up a color from an image with Color Picker tool
. - Checked "Enable Color range" checkbox shows transparent colors for the moment.
- Marking "Destination color" radio button let you choose basic transparent color manually by inputting in RGB format or with the help of Color Picker tool
. - "+\- values" radio button defines a width of the color range relative to the base color.
- Check "Invert region" checkbox if you want to invert the region.
- Press "Update" button if you want to see the region with your latest changes applied.